Are you looking to transfer your homemade brew to bottles or other containers? You will need to learn how to siphon beer the correct way.
This step of the beer-making process seems simple enough but the truth is it requires a bit of practice before you can get the hang of it.
There are two ways to siphon beer: using a racking cane or an auto-siphon. We’ll show you how to use both.

Tools
These are the supplies you will need to successfully siphon your beer:
- Racking cane or an auto-siphon
- Container into which you will siphon the beer
- Hose clamp
Before we walk you through the step-by-step process of siphoning beer, let’s first cover a few basics.
How Does Beer Siphoning Work?
The process of siphoning is based on Bernoulli’s principle, which states that ‘an increase in the speed of fluid occurs simultaneously with a decrease in pressure.’
Siphoning involves transferring liquid from a container placed at a raised level to another one that is at a lower level. This set up already creates a pressure difference. This pressure difference helps to increase the speed of fluid from the raised container to the lower one.
Why Should You Siphon Beer?
Siphoning is not the easiest thing in the world and it definitely has a learning curve. So, why bother with this cumbersome process? Why not transfer the beer manually from one container to the other?
Avoid the mess
Turns out that carefully siphoning your beer is greatly important. For starters, it minimizes the mess that would almost always happen if you were to simply pour beer from one container to another.
Prevent oxidation
Siphoning helps to reduce the amount of oxygen transferred into the beer. When beer comes into contact with oxygen, oxidation occurs and this can, in turn, affect the flavor of the beer.
This doesn’t mean that siphoning is completely oxygen-proof. Some oxygen will still be introduced but not as much as if you were transferring the beer manually.
Reduce sediment transfer
When you make beer, some sediments or by-products will remain in the brew. This residue is known as trub. When you are ready to bottle your beer, you do not want to transfer this trub to the storage container and the best way to do this is through siphoning.
Some residue might still be transferred but it will be kept to a minimum compared to if you were to manually pour the beer into other containers.
What To Use: Auto-Siphon Or Racking Cane?
When transferring beer, you can use either an auto-siphon or a racking cane. Each one has its own pros and cons, which you will have to weigh to decide which tool best suits your needs.
Using an auto-siphon is the easiest and most efficient method of the two. You can start the siphon with one stroke. On the other hand, a racking cane requires a bit more work but it might be more accessible to beginner brewers.
Both an auto-siphon and racking cane require some practice before you can master how to use them to siphon beer.
Now, let’s get to the interesting bit:
How To Siphon Beer Using an Auto-siphon
Follow these steps to successfully siphon beer using an auto-siphon.
Step 1. Set up the siphon
Place the cap on the tip of the auto-siphon. Attach the hose to the other end of the auto-siphon plastic tube. Slip the small plastic clamp through the free end of the hose and slide it up to the middle of the hose.
Step 2. Sanitize the siphoning kit
Siphoning has the potential to introduce bacteria into your beer, which can spoil or diminish the quality of the brew. You can prevent this by sanitizing your siphoning kit. Do this by pouring plastic-safe sanitizer through the hose and auto-siphon. Also, sanitize the containers you will use for this process.
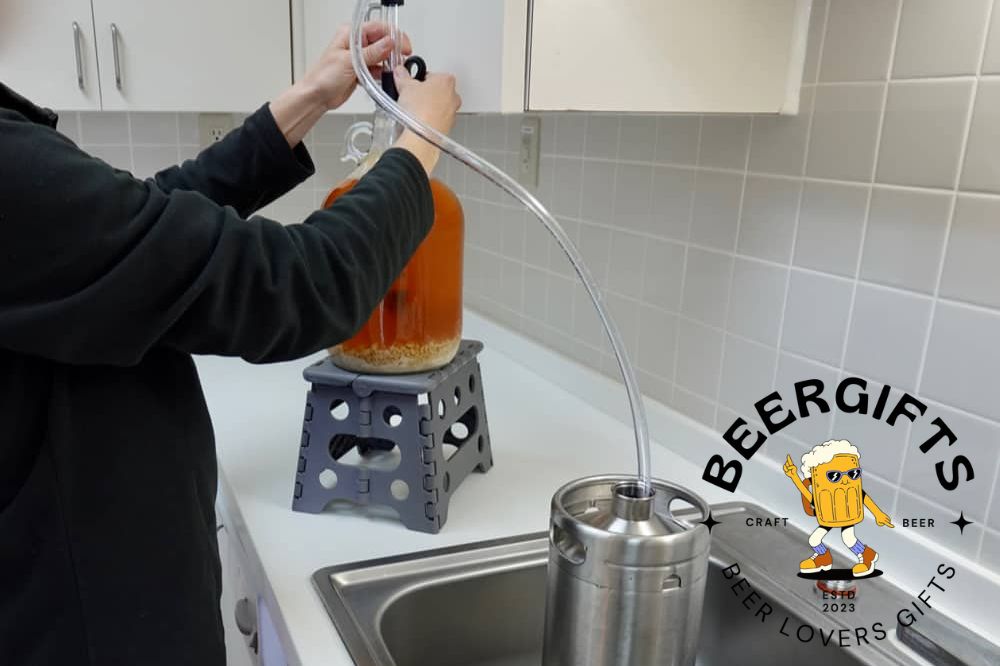
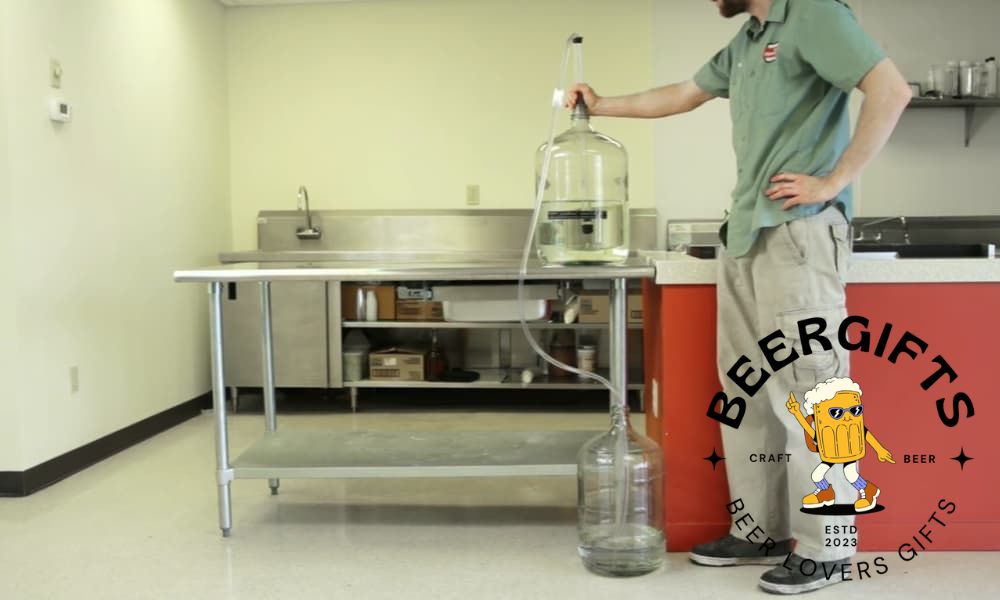
Step 3. Set up the containers to create a pressure difference
Siphoning requires a pressure difference for the fluid to move from one point to the other. You can do this by placing the container holding the beer on a raised platform such as the counter. Then, place the container that you want to siphon the beer into on a lower surface such as the floor.
Step 4. Position the auto-siphon inside the container holding the beer
If the container of beer has a stopper or lid, you will first have to remove these. Then, slowly slip the auto-siphon into the brew, being careful not to stir up the liquid and disturb the residue that has settled at the bottom of the container. Position the auto-siphon such that it touches the bottom of the container.
Step 5. Clamp the auto-siphon
As you siphon the beer, you should be careful not to stir up the brew too much. Remember, one of the reasons why you should siphon beer instead of just pouring it in a bottle is to minimize the transfer of sediments. Clamping the auto-siphon to the edge of the container of beer will go a long way in keeping the brew still.
Step 6. Position the hose
Once you have set up the auto-siphon side of your siphoning equipment, you can move to the hose side. Now, place the free side of the hose inside the container into which you want to siphon the beer.
Step 7. Get the auto-siphon going
This is where the auto-siphon comes in handy—you just need to pump it a few times to get the fluid going. To get started, simply lift the auto-siphon halfway and apply pressure one or two times.
This should get the beer flowing through the siphon tube, into the hose, and finally, into the container. Ideally, there should be no air bubbles in the tubing to ensure the smooth flow of the beer.
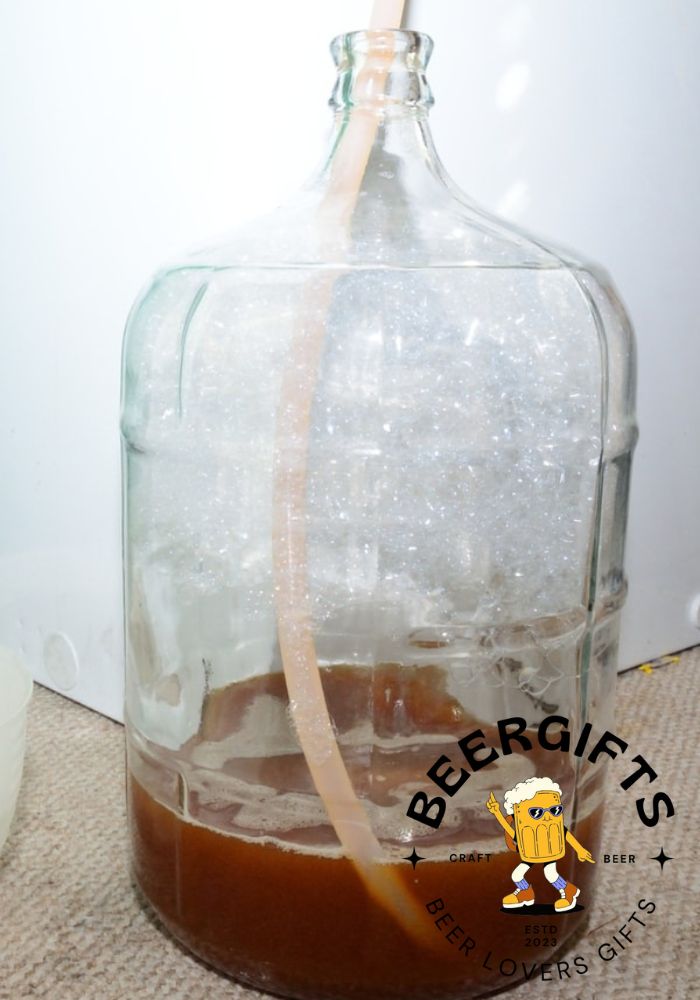
Step 8. Give the beer time to move between the two containers
Once the beer starts to move, you just need to be patient until much of it has successfully transferred to the other container or bottles.
The process will take a couple of minutes depending on several factors including the size of the opening of the auto-siphon, the diameter of the hose, the presence of air bubbles and sediments, and the angle at which you have positioned the tube.
Try as much as possible to keep the hose submerged into the liquid in the transfer container. This will also help with minimizing air bubbles that can potentially oxidize the beer.
If the fluid is moving too fast, try to adjust the clamp to make it slightly tighter around the hose. If the speed is slower than you want it, simply loosen the clamp on the hose to allow more fluid to pass through.
Step 9. Wrap it up
Once you have transferred all the beer from one container to the other, it is now time to disassemble the siphoning setup. Remove the hose from the transfer container.
Be careful not to splash the beer around and cause a mess. Place the lid over the container or if you siphoned into bottles, go ahead and place the caps on.
How To Siphon Beer Using A Racking Cane
Setting up a siphon using a racking cane is a bit challenging and will require a bit of practice. But, if a racking cane is what you have, follow these steps:
1. Fill the racking kit with water
When using a racking kit, water will provide the pressure needed to push the beer through the tubing. Before running water through the racking equipment, be sure to sanitize all the parts.
Attach the hose to the racking cane then hold the free end of the hose under a running tap of water. Allow the water to flow through the hose and out the other end of the racking cane then use the clamp to close the tube so that the water stays in the tubing.
2. Position the racking cane and hose
Slowly place the racking cane into the container holding the beer. As long as the clamp is still in place, the water will remain in the tubing and provide the pressure needed to siphon the beer. Be sure not to unsettle the beer to avoid transferring the trub to the other container.
Once the racking is in position, place the free end of the hose into the transfer container. Allow the hose to just sit still at the bottom of the container.
3. Get the beer flowing
With your siphon set up, it is now time to transfer the beer from one container to the other. Loosen the clamp on the hose to allow the water inside to flow out into the transfer container. This flow will trigger the beer to also flow into the container.
Do not worry about the water mixing with the beer. As it is just a small amount, the water will not affect the quality of the beer. But, if you really do not want to mix things up, you can loosen the clamp, allow the water to flow into another container, tighten the clamp as the beer is pulled into the hose, then loosen the clamp to transfer the beer into the container.
Summary
Siphoning your homebrew offers some great benefits: not only does it minimize the chance of making a mess; it also reduces oxidation and sediment transfer, ensuring that your beer is of tip-top quality. Whether you use an auto-siphon or racking cane to siphon beer, a bit of patience and practice will go a long way in ensuring that the process is successful.
Do you have any questions or comments on beer siphoning? We’d love to hear from you!