Dedicated home brewers will probably have heard of all grain brewing. But what exactly is it? And how do you do it?
We’re going to get beneath the surface of this brewing technique and find out everything there is to know. So if you’re considering all grain brewing yourself, sit back, crack open a cold beer, and prepare to learn more!

What is all grain brewing?
All grain brewing is used by almost all commercial breweries. Instead of using malt extract to make the wort, this technique uses the whole grain.
The barley grains are soaked in hot water. This turns the starch they contain into sugar. The sugary water that results from this is the wort.
The process before and after making the wort is very similar to other types of brews.
You’ll still be creating a sweet wort that’s nectar to microbes. That means you’ll still need to sanitize all your equipment carefully.
The main difference is that you can’t do partial boils with all grain brews. That means you’ll need some extra equipment.
Traditionally, all grain brewing uses a set-up with three vessels. It’s also possible to do it with a simplified “brew in a bag”, or BIAB, configuration.
The three-vessel set-up
The traditional three-vessel set-up starts with a container to heat up the water for your brew. This is called a “hot liquor tank”, or HLT for short.
You’ll also need a container in which to soak the grain, a process known as mashing. You can use the same one to separate the spent grains from the wort. This step is called lautering. If you’re using the same pot for both, it’s called a mash/lauter tun.
Your tun will need to have some way of draining away the wort while leaving the grains inside. They often have a false base to hold the grains while the liquid drains away.
There are advantages and disadvantages to using one container for both processes. The benefits are that it saves money and takes up less space. But you won’t be able to refill it with mash for another batch until all the wort has drained out.
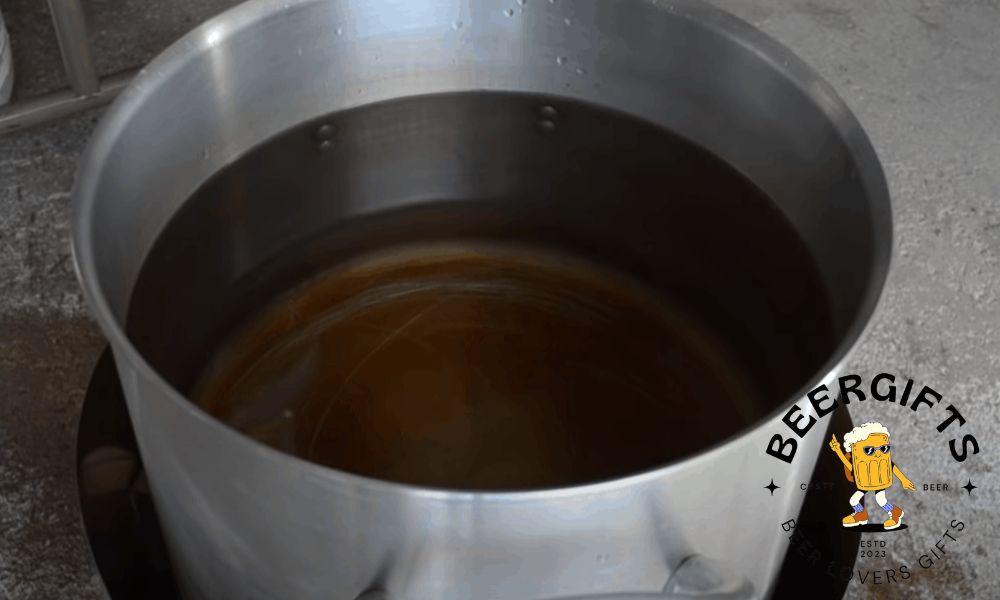
Finally, you’ll need a kettle. This is the container used to boil the wort.
If you’re brewing a 5-gallon batch, all these vessels will need to hold at least 6 gallons of wort. We’d recommend options with 10-gallon capacities if you have the space.
You’ll also need a burner capable of boiling your whole batch of wort. Some brewers use a propane stove. But if you prefer brewing indoors, most stovetops will work just as well.
And you’ll need somewhere cold enough to chill your wort. If you’ve got room in your refrigerator, that’s ideal. If you haven’t, consider getting your hands on a wort chiller. If you’re handy, you could even make one yourself.
Brew in a bag
The brew in a bag, or BIAB, system originated in Australia.
With this technique, the mash/lauter tun becomes the kettle too. Instead of putting the grain directly into the tun, you place it inside a mesh bag. The edges of the bag are then draped over the rim of the tun.
The grain is stirred into the water. When it’s spent, the bag is simply lifted out of the tun, which then acts as the kettle. It’s a bit like removing a tea bag from a teapot.
If you’re wondering whether such a simple process creates difficulties, you’re not alone. But a lot of research has been done into this. The upshot was that it’s fine – and may even benefit beer quality.
How to all grain brewing
Step 1. Calculate the amount of water
When you’ve set up and sanitized your kit, make a dipstick to check how much liquid is in your containers.
It’s now time for some maths. Calculate the amount of water you’ll mix in with the crushed grain, and the amount needed to rinse the grain bed. The water for mixing is called strike water, and that for draining is sparge water.
The precise amount of water you’ll need depends on your recipe and preferences. Take a note of what you use, and be prepared to experiment!
- For the strike water, measure your grain in pounds. Now multiply that by a number between 1.25 and 1.375. That will give you the amount you need in quarts.
- If you’re measuring in grams, multiply the weight of your grain by between 2.6 and 2.9. That will give you the required volume in liters. If you’re using a mash/lauter tun with a false bottom, add the capacity of that bottom section to the total too.
Pro Tips: For the sparge water, you’ll want 20 percent more than your target volume of wort before boiling. If in any doubt, err on the side of caution. It’s better to have too much water than too little.
Step 2. Preparing the grain
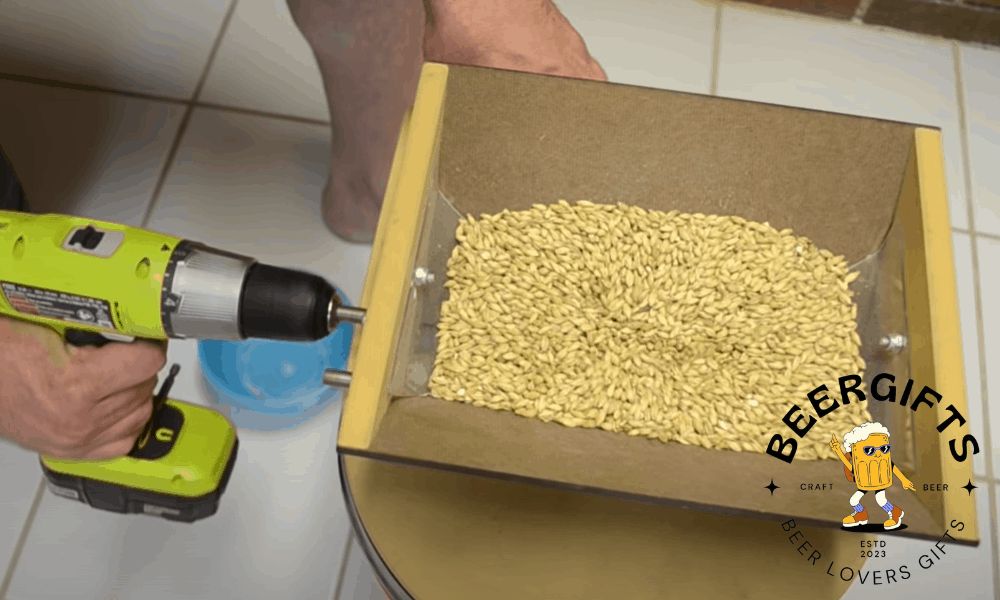
Your grain needs to be crushed – “cracked” – before it’s used. If you’re getting your barley from a homebrew store, they’ll be able to do that for you.
If you’re doing it yourself, you’ll need a grain mill. The default setting will be fine – but note what it is. Monitor the results, and over time you’ll be able to fine-tune this part of your brewing process.
Take a look at the grain to make sure it’s properly cracked. You should see most kernels broken into halves or quarters. Very few should be left whole.
Step 3. Mashing in
Mashing in is the first time the grains come into contact with the water. You need to heat your strike water first.
The exact temperature is up to you and the characteristics of your brew. A good rule of thumb is to heat the water to 11 degrees Fahrenheit higher than the temperature your recipe states for the mash. If you want to be more precise, you can use a strike water temperature calculator.
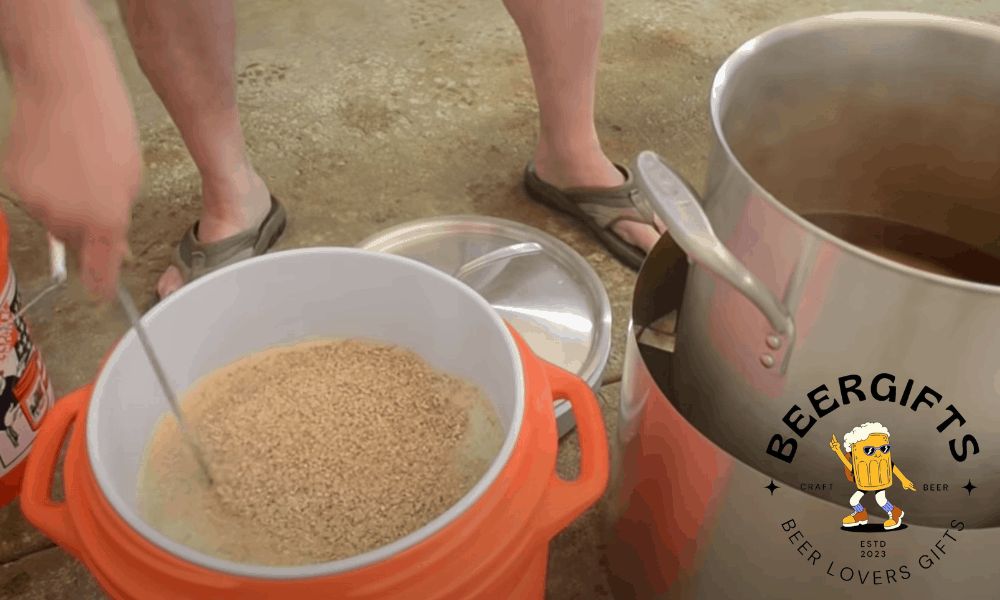
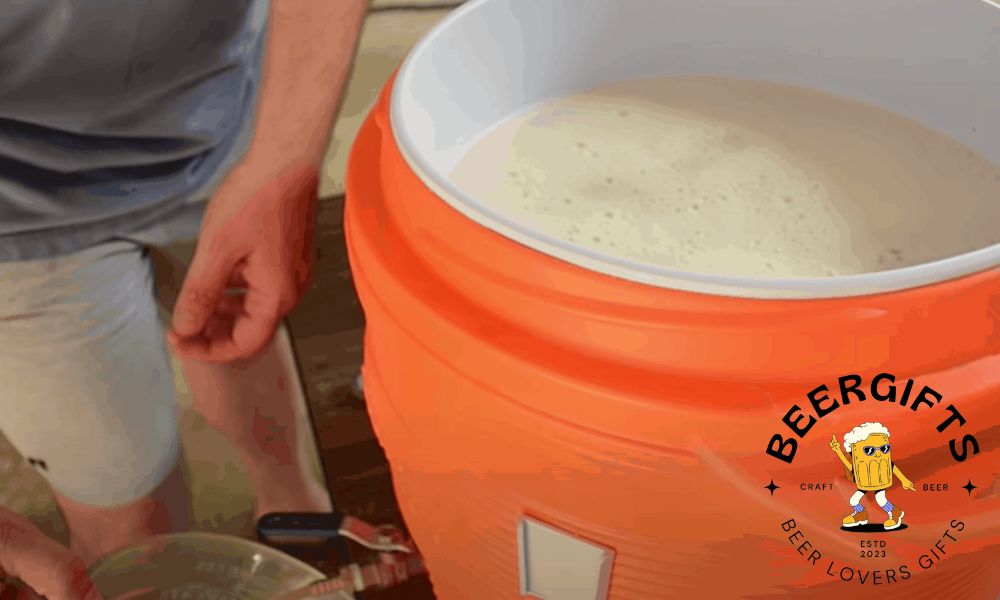
Next, mix together your crushed grains and strike water in the HLT. You want the grains to settle into a bed at the bottom of the tun. The idea is for that grain bed to be a consistent temperature throughout.
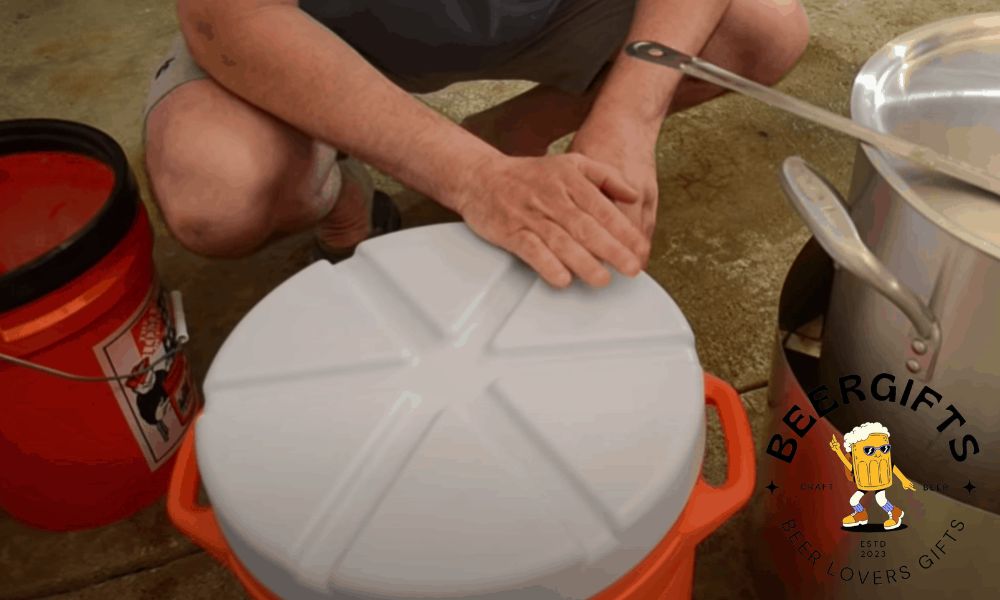
The grain is stirred in bit by bit. Each sample is mixed into the water with a paddle until it dissolves. The process is repeated until all the grain is gone. The lid is then placed on the tun to keep the heat in.
Step 4. Letting the mash rest
The mash now needs to sit and rest for a while. During this time, the starch in the grain will be converted to sugar. The length of time needed for this will be stated in the recipe. Most homebrews need the mash to rest for about an hour.
Ideally, you want your mash to stay at the same temperature throughout this period. In reality, though, it’s hard to achieve this with a domestic brewing set-up. You can help by insulating the tun with towels or blankets.
You may or may not wish to stir your mash while it’s resting. Doing so can help the grain bed stay a constant temperature throughout. But removing the lid and inserting a cold paddle can reduce the temperature. Most brewers prefer to leave it alone.
Step 5. Lautering
When your mash has rested, it’s time for the next stage – lautering.
The first part of this is what’s called “mashing out”. You don’t have to do it, but it will thin down the wort and make it easier to collect. Increase the temperature of the grain bed to 170 degrees Fahrenheit by heating the container or adding hot water. Then wait for five minutes.
It’s now time for recirculation. This simply means drawing off wort from the bottom of the tun and adding it back in at the top. If you have a pump, it’s easy. If not, just use the spigot and a pitcher. Do this for 20 minutes, or until the wort is fairly clear.
Step 6. Sparging
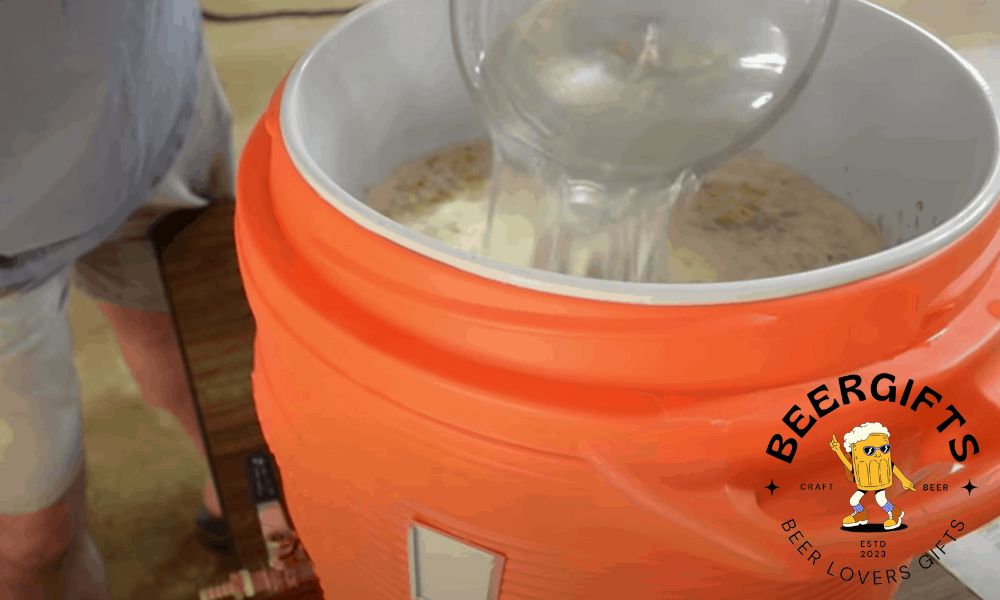
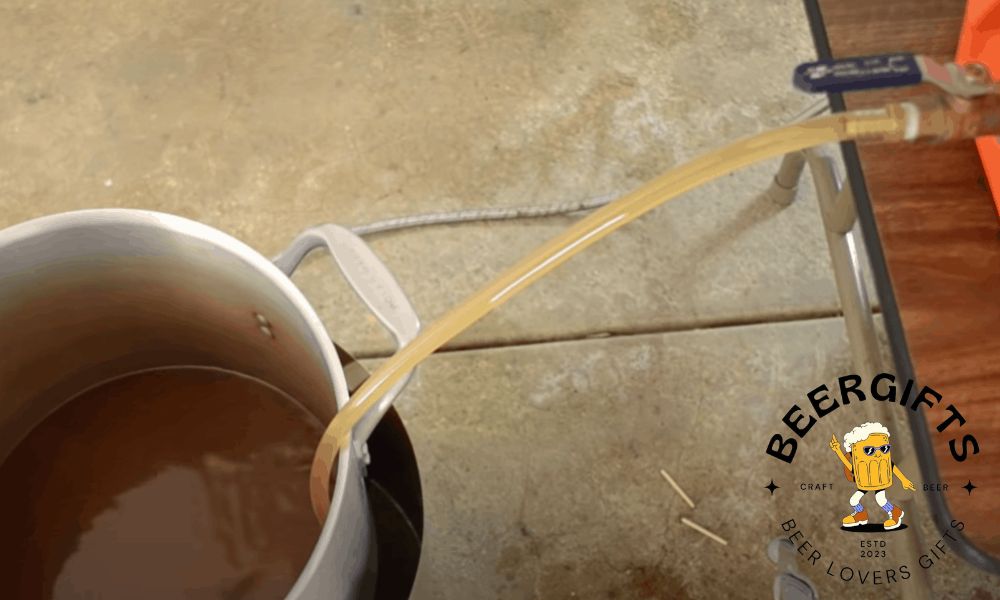
Now you’re ready to collect the wort. To do this, you’ll need your sparge water. Position your kettle beneath the tun, then open the spigot and let the wort drain out. As it does so, add your sparge water to the top.
The aim is to add water at the same rate the wort is draining out. You also want to keep the grain bed at 170 degrees. To do that, the water in your HLT may need to be hotter than this, especially if it passes through tubing to get to your tun.
Keep going until you’ve got the same volume in your kettle as the volume of your pre-boil wort. Or take a look at “when to stop sparging” for alternative approaches to deciding when to stop.
Step 7. Finishing up
The rest of the process is the same as for brewing with malt extract.
Remember, just as with other types of homebrewing, all grain brewing is all about experimentation! Take regular measurements throughout the process – the volume of strike and sparge water, and the temperature of your grain bed at different stages.
Make a note of all this information. It will help you refine your recipes and technique over time.
Ready to try all grain brewing?
We hope our overview of all grain brewing has inspired you to give it a go! There’s lots of information on every part of the process available online. And remember – this is a process that takes time and experience to perfect. Enjoy the journey!
Good luck with your next all grain homebrew. Cheers!
hi I have a dilema
can I directly bottle the beer after fermentation because I have seen I have to put it in barrel for ten days to ripen before bottling
what type of barrel should I use